Here’s a very quick and simple project I was asked to do. These lamps belong to a neighbor, who keeps them on a table on her porch. Apparently they aren’t very stable. She said they tip and even blow over very easily, and she asked me to attach them to a base of some sort. Her only suggestion was to keep things simple and efficient. Actually, she added that whatever I did shouldn’t add too much to the height of the lamps, so the bases needed to be relatively thin.

I checked my inventory of materials, and found this board left over from making shelves in our kitchen. It’s only a half-inch thick, and has a smooth painted-like finish on one side. It was purchased a while ago at a local big-box store. I thought it would make a perfect base, and was already just about as wide as I would make the bases, meaning that I’d only have to cut in one direction to make things square.

I used a miter saw to cut them to size. If I would have had to cut them in two directions, I would have used a table saw and fence to ensure they would be uniform and square.

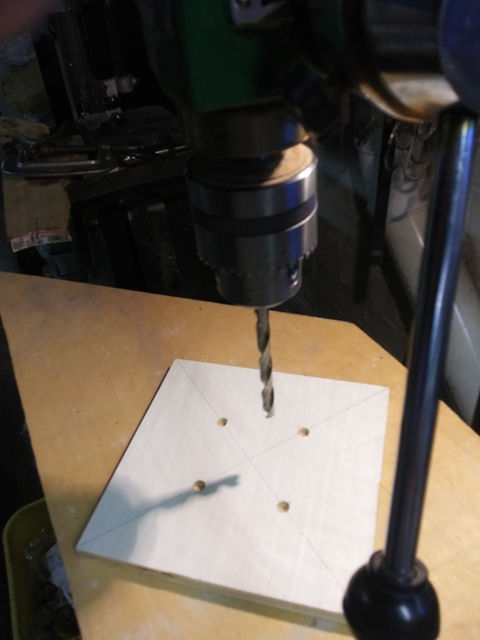
I checked things over with a speed square and drew lines from corner to corner. Then I marked the locations along those diagonals where the little ball feet of the lamps touched.


One of the gadgets I seem to use quite often is a gauge with various size holes in it. It’s very useful for finding the dimension of something like a drill bit that has its sizing marks worn off. In this case, it was the perfect thing to measure the diameter of the ball feet.

My drill press was used to make matching receiving holes for those feet. Its adjustable depth stop enabled all holes to be the same without piercing through the wood.
I test-fit the lamps into their locating holes.

The smooth pre-finished surface of the bases made it very easy to decide how to finish things. I chose a gloss black enamel spray paint in a rattle-can and applied several coats. I did a few coats without the lamps in place…

…but did the final coat after putting a dab of quick-setting epoxy into each hole and setting the lamp feet into them. Since the metal lamps are also gloss black, I didn’t even have to mask anything off!
Here they are, completed and delivered to the neighbor’s porch.

I hope all your projects go well. Thanks for reading, and happy restoring!
Ed
If you’d like to download a PDF of this “Ideas” column, click here:
Comments